This is a step-by-step instructions on how I shot my Adams Falls Time-lapse – with my Canon EOS Rebel T2i (550D / Kiss X4) running Magic Lantern 2.3.
Tim Devine, his eldest son and I hiked Heberly Run at State Game Lands Number 13 and upon heading back, stopped by Adams Falls at Ricketts Glen State Park (Fairmount Township). Taking some pics and my aforementioned, Time-lapse.
This quick HowTo is under the assumption that you have Magic Lantern 2.3 (or later) installed on your Canon EOS camera.
(You will need a Canon EOS camera that has a movie mode.. if you don’t own one and would like to give it a try, you can buy inexpensive models like the SL1, T3, T1i, etc. on eBay or used from: Canon (refurbished), B&H Photo, Adorama, KEH, etc.
You also will need a tripod to keep your camera steady while it captures your Time-lapse. You can buy expensive rigs that pan and / or rotate as you capture your Time-lapse – but I just used my tripod)
I captured it with the movie mode to make it easier to upload… The “normal” way is to use a dedicated intervalometer or the one built-in to Magic Lantern. This way, I didn’t have to import / resize any images or assemble them into a movie clip. I’m sure the quality would be much better overall using still images as the source. I went the “Quick-and Dirty” route..
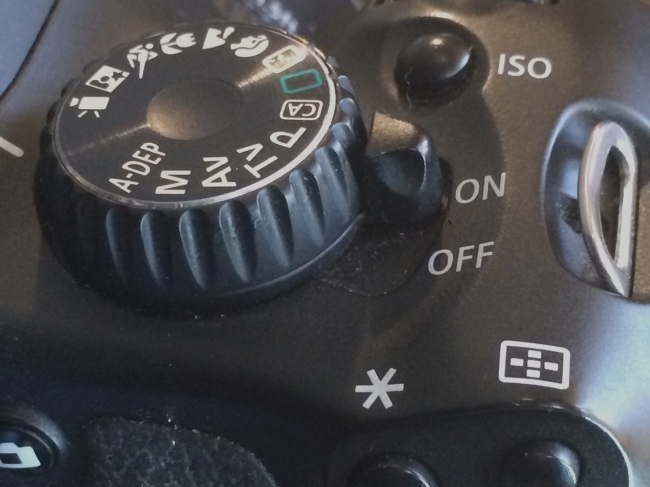
1. Boot up your camera, then click the button that brings up the Magic Lantern interface. (On my T2i, its a switch on the right side of the mode dial. And the ML menu is the Trash Can button)
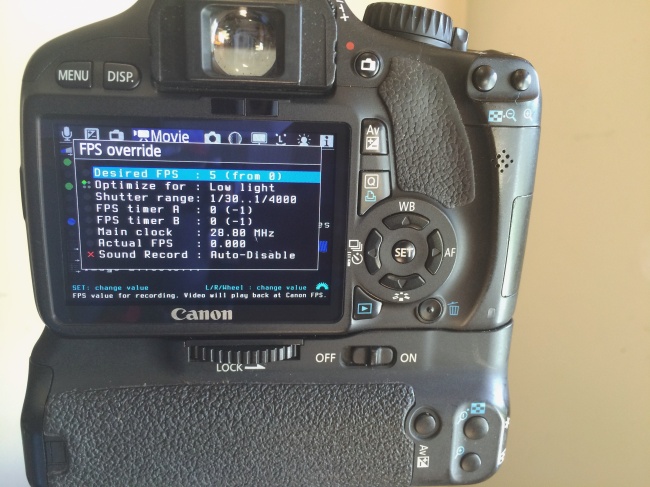
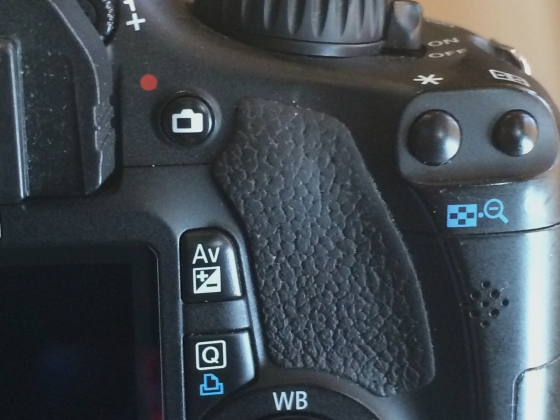
2. Then go to the Movie menu and then scroll to “FPS override“. Select it (On my T2i, you use the direction buttons and tap the Quick Menu “Q” button)
3. I set the frames per sec to 5 (it appears further down in the menu as 4.995 under Actual FPS)
Then back out of the menu. (On my T2i, it the Quick Menu button) And Exit the ML menu. (On my T2i, its the Trash Can button)
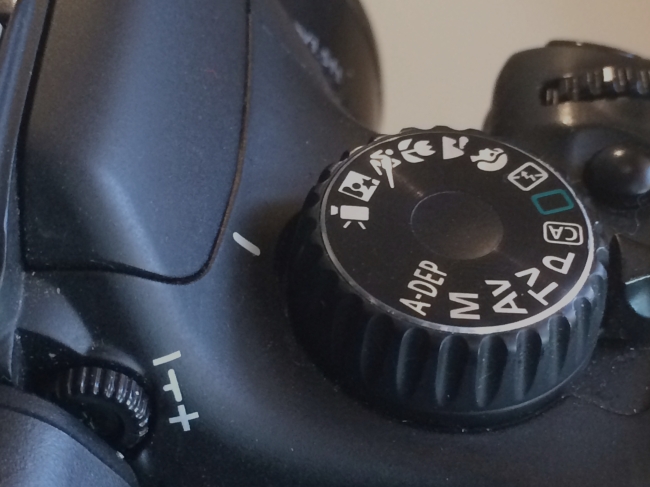
4. Switch your camera into its Movie mode. (On my T2i, its on the mode dial on top of the camera – the Movie camera icon)
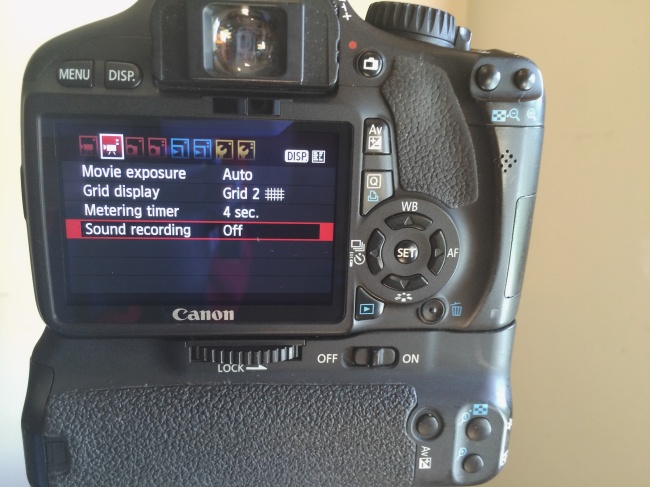
5. Bring up the Movie menu options and select what resolution you’d like to capture your Time-lapse in. (On my T2i, I tap the “Menu” button – I selected 1080p at 30fps)
6. You may or may not have another menu screen. (On my 2nd options screen, I have Movie Exposure, Grid display. Metering Timer and Sound recording). Please note that ML disables sound when you are capturing a Time-lapse.
7. Compose your subject, set focus and Hit the Record button. (On my T2i, its a dedicated Record button that has a camera icon and a Red dot to the upper-left of the button. You will notice immediately that the speed of the Live view is dramatic lowering… in my case, 5fps! Remember to turn this off once you’re finished capturing your Time-lapse)
8. Once you’re finished with your Time-lapse. Hit the Record button again to stop your movie. (On my T2i, its a dedicated Record button that has a camera icon and a Red dot to the upper-left of the button.)
9. Power down your camera and pull out the memory card and import your Time-lapse movie to your computer (you can also hook up your connection cable; usually USB and import to your computer that way).
10. Log into one or more of your various Social Media web site accounts: YouTube, Vimeo, Facebook, Google+, etc. and upload your creation!
If you have any questions, please leave a comment and I’ll try to answer it for you.
Here’s a bonus Time-lapse (captured on the same day). This Is Lewis Falls on Heberly Run at State Game Lands Number 13.
From time-to-time, I upload Time-lapse movies to my YouTube account at:
And for my photography, you can visit my web site at:




Very cool, Aaron. Very thorough instruction. Thanks for sharing.
Thank you kindly, Marty. Thanks for commenting..